

How to create and use a website favicon
What is Favicon
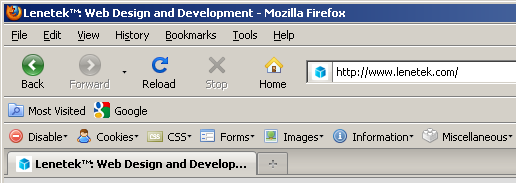
A favicon (pronounced 'fav-ee-kon', short for favorites icon), also known as a shortcut icon, website icon, URL icon, or bookmark icon is a tiny square image, usually 16x16 pixels, shown to the left of a web browser's address bar and associated with a particular website or web page; favicon is also displayed on the browser's tab:
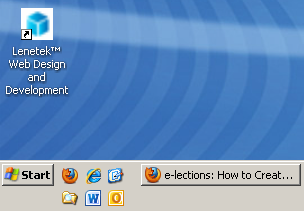
If you save a shortcut to a web page on your desktop, Windows shows the favicon of that web page as the shortcut icon:
Favicons also show up in news feeds, so it is important to have a favicon for a website as it creates a visual association with a particular URL making it part of the overall website branding.
Favicons are created in an .ICO file format which is an image file format for icons in MS Windows. ICO format supports transparency and animation. ICO files contain one or more small images that can be of multiple sizes and color depths. Most often they are 16x16 pixels, but can be 32x32, 48x48, 64x64, or even 256x256 pixels. But don't go overboard here, the larger the image the longer it downloads.
How to Create Favicon Using Online Tools
There is a plethora of various online tools that allow to upload your existing higher resolution image, for example - your logo, reduce it to 16x16 pixels, and then download a favicon file to your computer. Here is a couple of them:
- https://www.favicon.cc (allows online favicon editing, including creating transparent pixels.)
- https://www.favicon-generator.org/ (favicon & app icon generator)
- https://www.favicongenerator.com/ (my favorite!)
How to Create Favicon in Photoshop
You may also create a favicon directly in Photoshop using one of the following techniques. For example see:
- tutorial Mysteries Of The Favicon.ico - How To Create A Favicon In Photoshop by Jennifer Apple,
- article Design a Website Favicon in Photoshop by Jennifer Farley.
You will need the ICO Format plugin for Photoshop which you can download from http://www.telegraphics.com.au/sw. This plugin allows reading and writing ICO files via Photoshop.
In short, the process of creating a favicon in Photoshop consists of the following three steps:
- Create or open your square image in Photoshop.
- Select Image → Image Size. Make sure Constrain Proportions checkbox at the bottom of the dialog box is checked, then set the Width or Height field to 16 pixels - Photoshop will automatically change the other field to 16. If your image looks blurry, use the Unsharp Mask filter to make it sharp.
- Select File → Save As, name the file favicon and pick ICO (Windows Icon) (*.ICO) format from the Format drop-down menu.
How to Use Favicon
In order to make use of your newly created favicon, upload your file, favicon.ico, into the root directory of your website. Most browsers will find it there automatically. For other browsers, you may want to include the following two link tags in the head section of each html page:
<link rel="shortcut icon" href="/favicon.ico" type="image/x-icon">
<link rel="icon" href="/favicon.ico" type="image/x-icon">
This will ensure your favicon will appear in most browsers (Internet Explorer, Firefox, Chrome, Safari, Opera, etc.)
You may use name different from favicon.ico, however in this case the file won't be automatically picked up by browsers as favicon, and you must use the above link tags to specify your favicon file name.
Sometimes, after you upload your favicon and insert the link tags, the favicon still does not display. Try refreshing the browser window, or clearing its cache. It will show up eventually.